
2 little hooligans play tent tutorial

Materials needed:
*3 twin flat sheets- 2 of the sheets should be of the same pattern. (I bought 4 because I wanted contrasting colors and I am planning on making some accessories for my tent.)
*1 hula hoop (I bought one of the larger hoops, 36")


This is what my templet looks like. Your measurements should be the same as the ones shown.


With right sides facing, sew two triangles together on one side. Sew one more triangle to the other two. Should have three triangles sewn together like here. Repeat with the other three triangles.

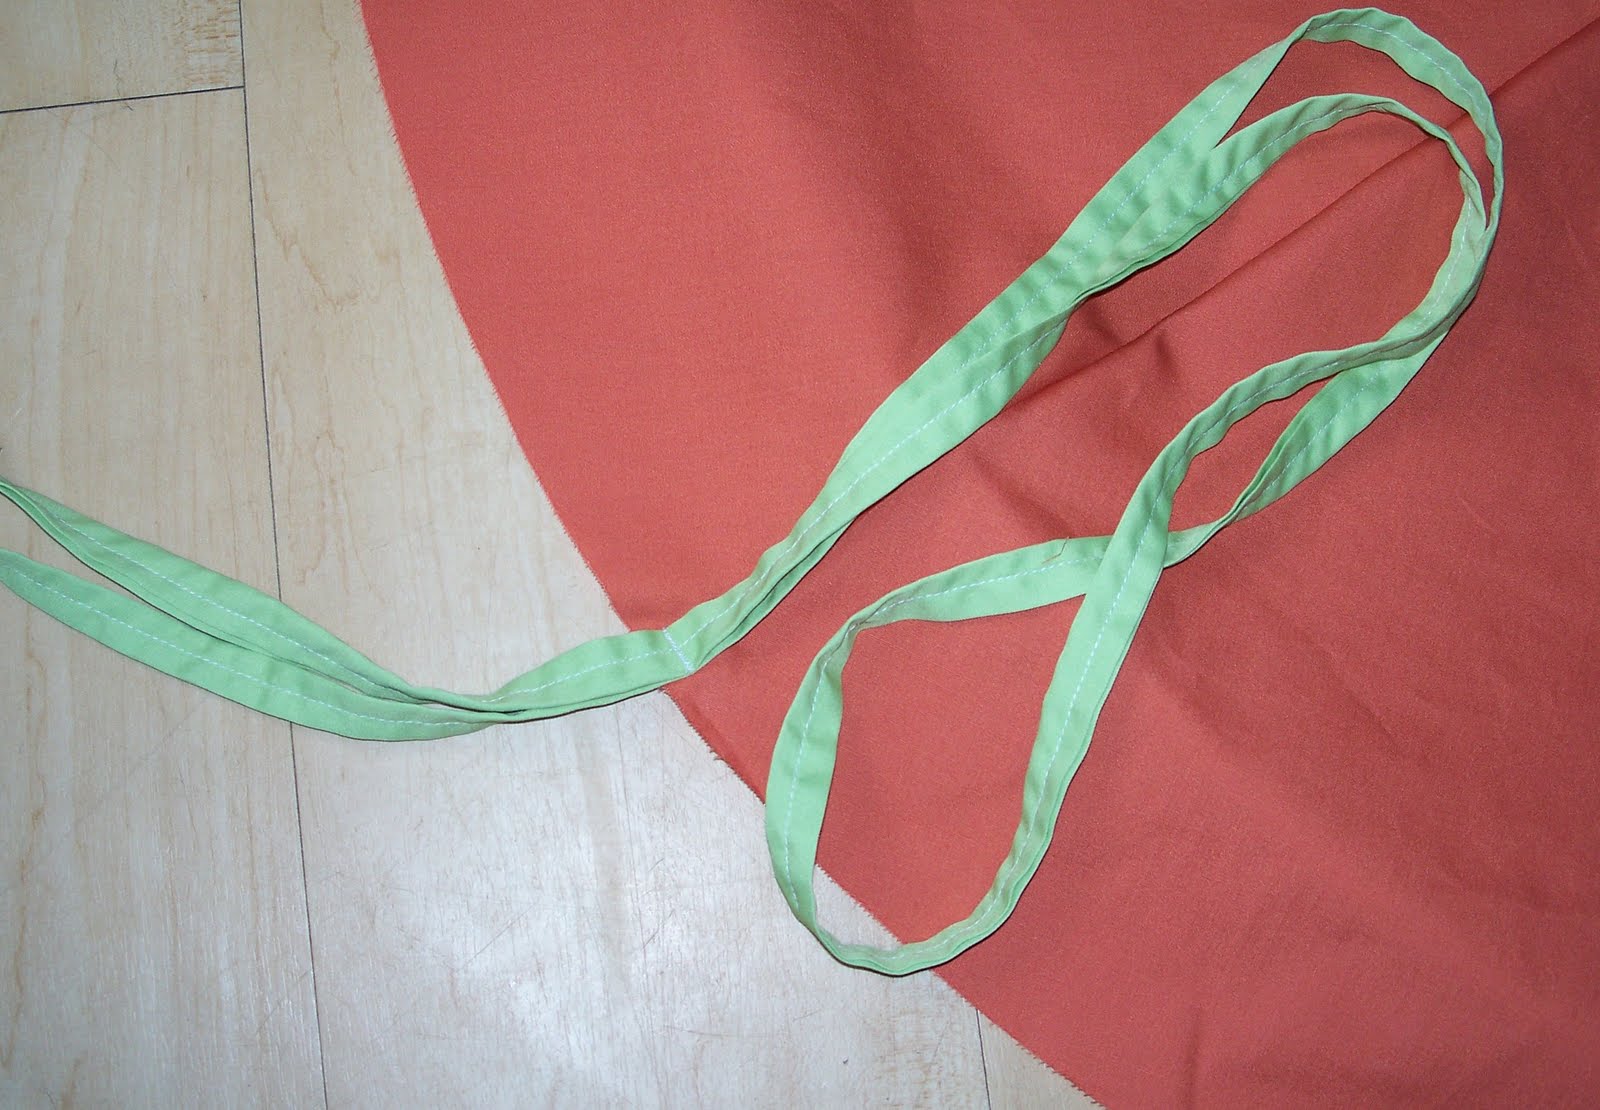
Take the 30" by 1" wide tie and sew a loop on one end. This will be used inside of tent to hang things on.

Take one of the triangle sets and pin the looped tie to right side of fabric. Let it overhang a few inches like above. With right sides facing, pin other triangle set on top of the first one. Pin in place on the straight edge only and sew.

Make sure you back stitch a few times over the tie. This needs to be very sturdy. This is what the tent will be hanging by.

Should look like this so far.
If you want to, at this point add some Velcro to the tie.

Should look like this on bottom side.

Gather the four 1/2" ties.
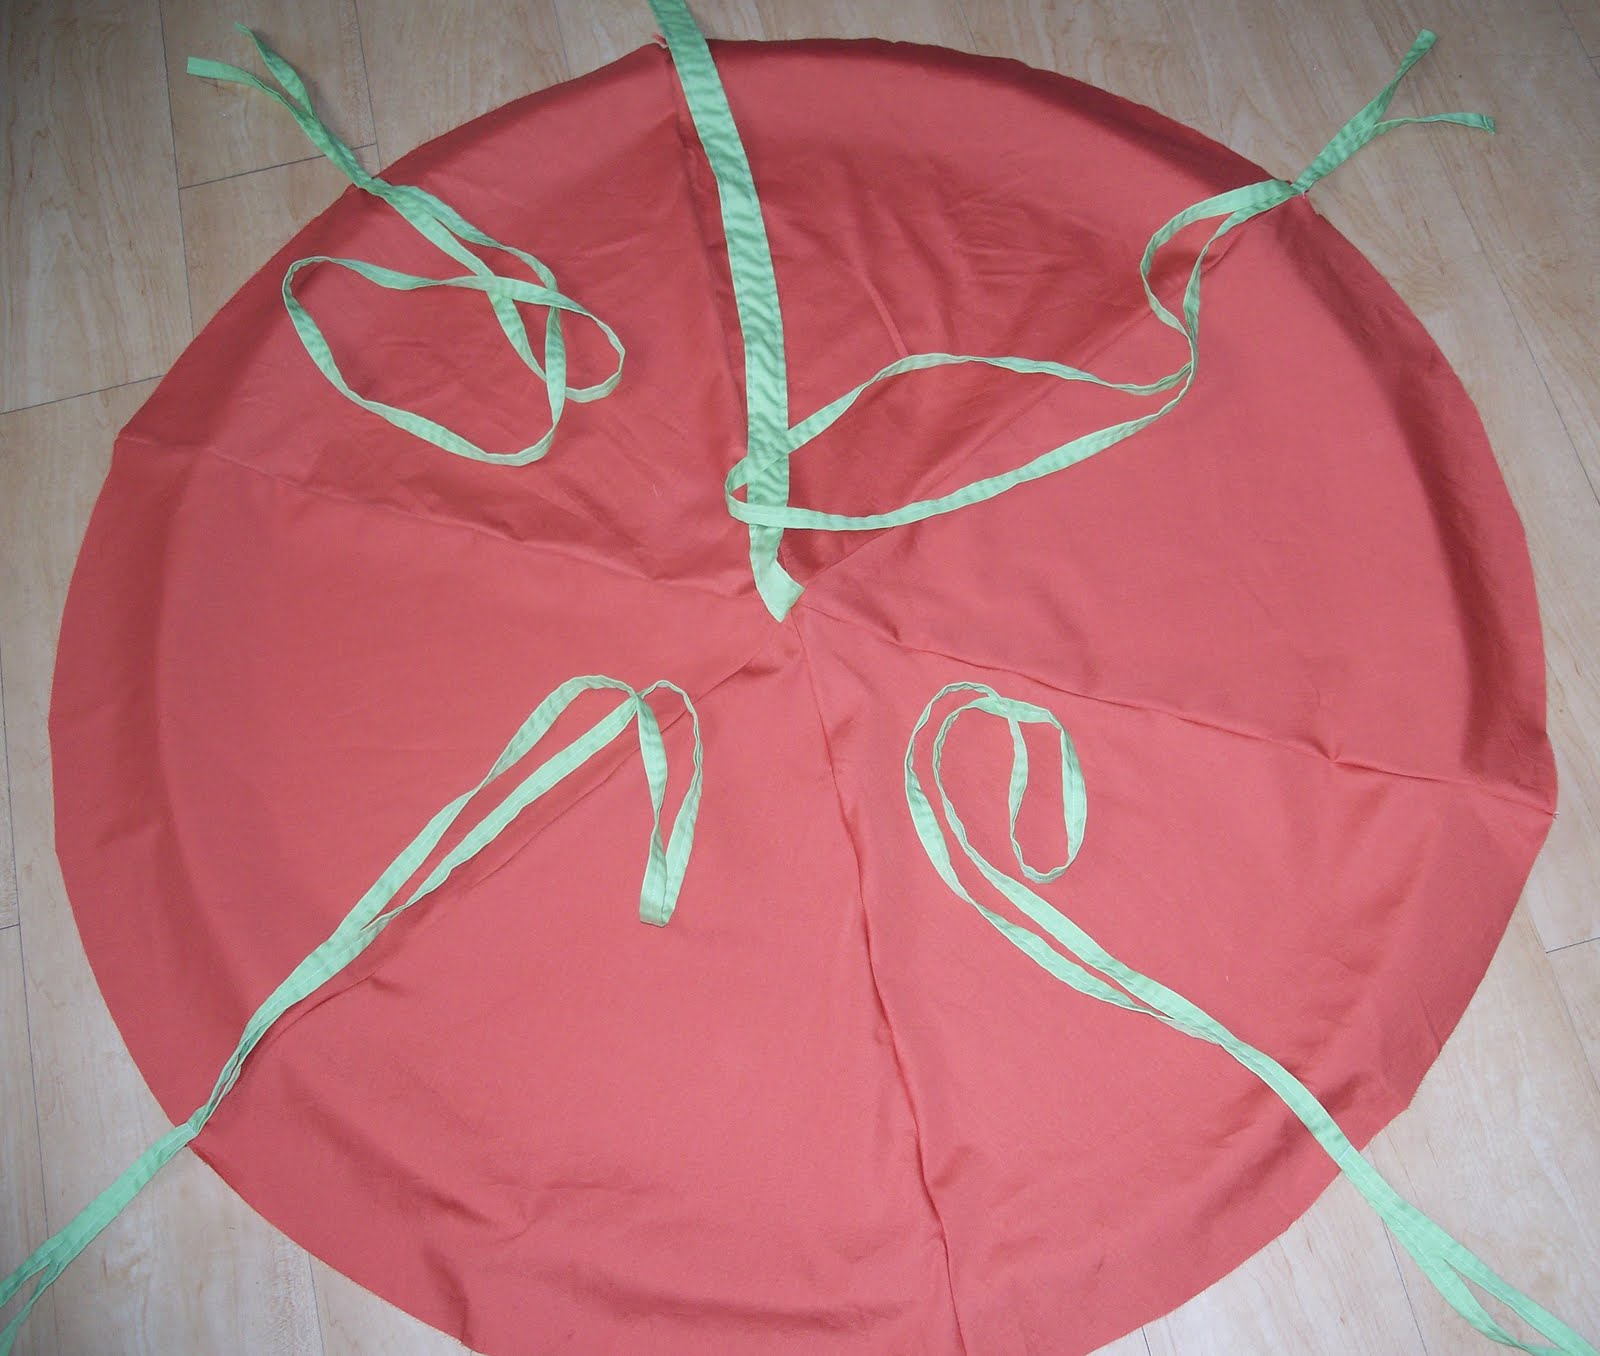
Evenly space them out around the top (circle.) Pin the ties in place. I left about 8" hanging off the top, which will be used to tie the hula hoop on. The longest part of the ties are going to end up being on the outside of tent and will be tied into a bow.
Sew in place, remember to back stitch a few times!
Set top aside.
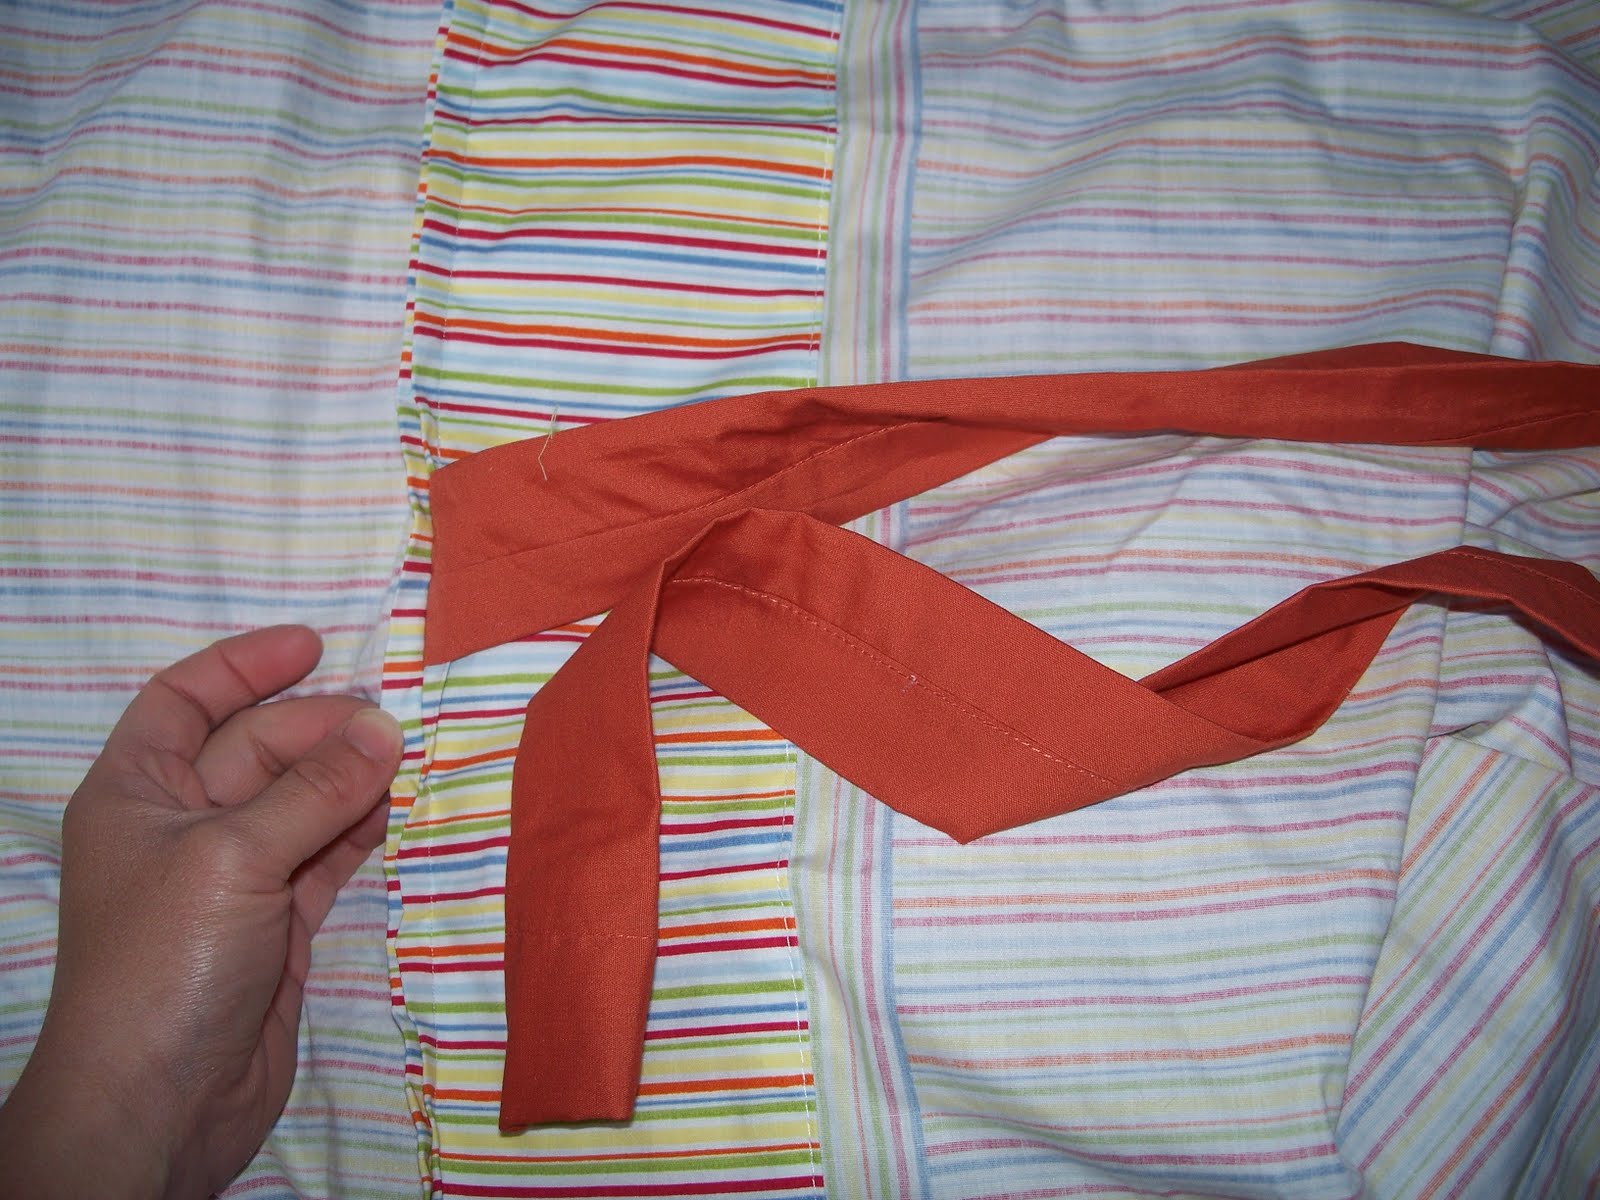
Before you sew the sheets together, measure down about 25" from the top of where the two sheets will be sewn together. Place the middle of the 80" by 2" wide tie half way in. You will end up with half of the tie on the right sides of fabric and the other half will be hanging out. Sew sheets together.
Now it is time to sew the sheets and top (circle.) together. Start by pinning right sides of top (circle) and sheets together. Make sure that the long ties are tucked in and short ties are hanging on the outside.
The sheets will overlap one another about 3" or so at the end. That is what you want. It will make the opening of the tent a little sturdier.

Here is the overlap and the opening that will be your door.

This is what you should have.
You can see the extra sheet that was sewn together and the overlapped part.

Finish off raw edges of sheet.

Outside of tent.

Inside of tent.
My sheets came in these cute little bags, so I just had to use them.

I sewed two of them on the inside of tent about 20" from bottom.

And these on the outside of tent. I placed mine about 12" from the door at staggered heights.
**Updated part of the tutorial **
I noticed that the hula hoop was not staying in place. It was falling down an inch or so from where it should have been. It was causing the top to look loose. So, I decided to just sew one of my ties up 1" to make the hoop fit more securely. Now the hula hoop fits snuggly and the top of the tent looks great. Now the hoop lies right on the sewed seam of where the top and sides meet. Here is how I did it. Working on the wrong sides of fabric with the same color thread as the top of the tent.


Simple right? Now you are ready to attach the hula hoop.

Turn tent inside out and tie hoop on with the little ties.

Should have this now, turn right side out and you are finished! Find a great spot to tie or anchor the tent to.


**Please feel free to use this tutorial for your personal sewing projects. You may link this to your blog and use any photo's, just be kind and give credit where credit is due. I spent many late nights working on this. Happy sewing!
Any questions or comments please contact me. If you make a tent using this tutorial please send me an email or add it to my flickr group.


Thank you so much for this tute!! I have been looking for something exactly like this!!! :) Thank you!!
ReplyDeleteThis is wonderful. Thank you so much.
ReplyDeleteoh my gosh this is beautiful xxxx
ReplyDeleteThis is a wonderful Tut. Thank you! I can't wait to try it!
ReplyDeleteDid you use organza for the pink tent? My 4yr old daughter saw it and now wants one for her room. :)
ReplyDeletehi denise, i used a sheer sheet that i bought from walmart. hope that helps:)
ReplyDeleteThank you so much. That helps a lot and saves me a lot of money on fabric.
ReplyDeleteshame it can't be brought over the internet
ReplyDeleteThank you. After having your original post bookmarked for about a year I finally got round to making it! My girls love it! http://motherrhythm.blogspot.com/2011/07/tent-for-play-and-shade.html and http://motherrhythm.blogspot.com/2011/07/birthday-cakes-and-balloons.html
ReplyDeleteA little confused on template....you state that is should be 24" long on the sides and 22" wide at the base. But in the template it is 19 1/2" long on the sides and 18 1/2" wide at the base.
ReplyDeleteWhich one do I use?
Jessica
hi jessica, you want to cut out your triangles so that they are 24" long on the sides and 22" wide at the base. then use your hula hoop as a guide to give the triangles their curve which comes out to be about 19 1/2" long on the sides and about 18 1/2" wide at the base once curved and cut. does that help you out any better?
ReplyDeleteThese are great! Do you sell them? I have no time but I would love to use this as a photo prop.
ReplyDeleteGosh your tents are lovely! Thanks for posting the tutorial as well. I've got this linked to my play tents post too today, for inspiration!
ReplyDeleteI'm hoping to make one of these as a Christmas gift. But the hoola hoop I found was 35 1/2 inches across... My brain isn't wrapping around the math... How much do I need to change the width and/or length of the triangle for the top? I am excited to see how it turns out!
ReplyDeleteanonymous, you wont have to worry about the 1/2" difference. you should have no problem at all following the tutorial as is.
ReplyDeleteThis comment has been removed by the author.
ReplyDeleteLOVE your site. Pinning it madly! Thank you!
ReplyDeleteI am so confused by the 4 1/2" ties. Do they get sewn on the inside or the outside?? Thanks!
ReplyDeletethe ties get sewn on the inside and outside of the tent. when attaching the the sides of the tent to the round top you tuck the long ties in and short ties are hanging on the outside. so when finished the shorter part of the ties will be on the inside for attaching the hoop in place and the longer part of the ties will be on the outside for decorations. does that clarify bettter?
ReplyDeleteAny chance you would sell one? I do not sew and my 4 year old daughter squealed with delight when she saw this!
ReplyDeletethis is adorable! wish I had one as a kid. I wonder if it would be possible to make a castle with three hoola hoops (center one the highest, the two on the side a little lower? you'd just need somewhere big enough to hang all three I guess.
ReplyDeleteDo you sell these??
ReplyDeleteIf you sell these I'd like to buy one please
ReplyDeletePlease let me know if you sell these as I would buy one for my daughter and my son who has CHD ... I just know this will help with bonding and alone time.
ReplyDeleteDo you have a seperate tutorial for the last tent pictured?
ReplyDeleteMaking one with my daughter now. Thanks for sharing.
ReplyDeleteInstead of doing the triangles couldn't you just cut out a circle of fabric?
ReplyDelete